We’ve been eager to try a wallpaper accent somewhere in the duplex, and last week we finally installed not one, but two, removable wall murals! And I can’t begin to describe how much easier and cheaper it was than we expected, plus it turned out like ten times better than we had even hoped.
If you’ve listened to our podcast recently, you may recognize this space as one of the small sleeping nooks on each side of the duplex. The rooms are only about 8′ x 8′ and our goal is to turn them into fun bonus sleeping spaces. So they felt like natural candidates for a bold injection of color and pattern.
We had our eyes on a few wallpapers, but then we stumbled across these removable wall murals on Society6. They’re effectively the same as wallpaper, except that their patterns can’t be repeated indefinitely (most are 8′ wide but some are 12′) so they’re perfect for smaller walls like ours. A few other things that we liked were:
- there were some nice large-scale patterns and images compared to most wallpaper in our price range
- they’re extra convenient to use – no glue, easy to restick if you don’t line them up right the first time, etc.
- they have a demo video right on the site when you’re shopping to give you an idea of what to expect when you hang them
- they’re made from a strong/durable material (almost like a thick flexible vinyl decal with fabric fibers woven through it) so it’s very substantial, whereas some wallpaper feels more delicate
*This isn’t sponsored – we bought them with our own money & found them on our own – just figured I should put that out there since clearly I’m gushing.
We liked a lot of the ones that we found on their site, like these below:

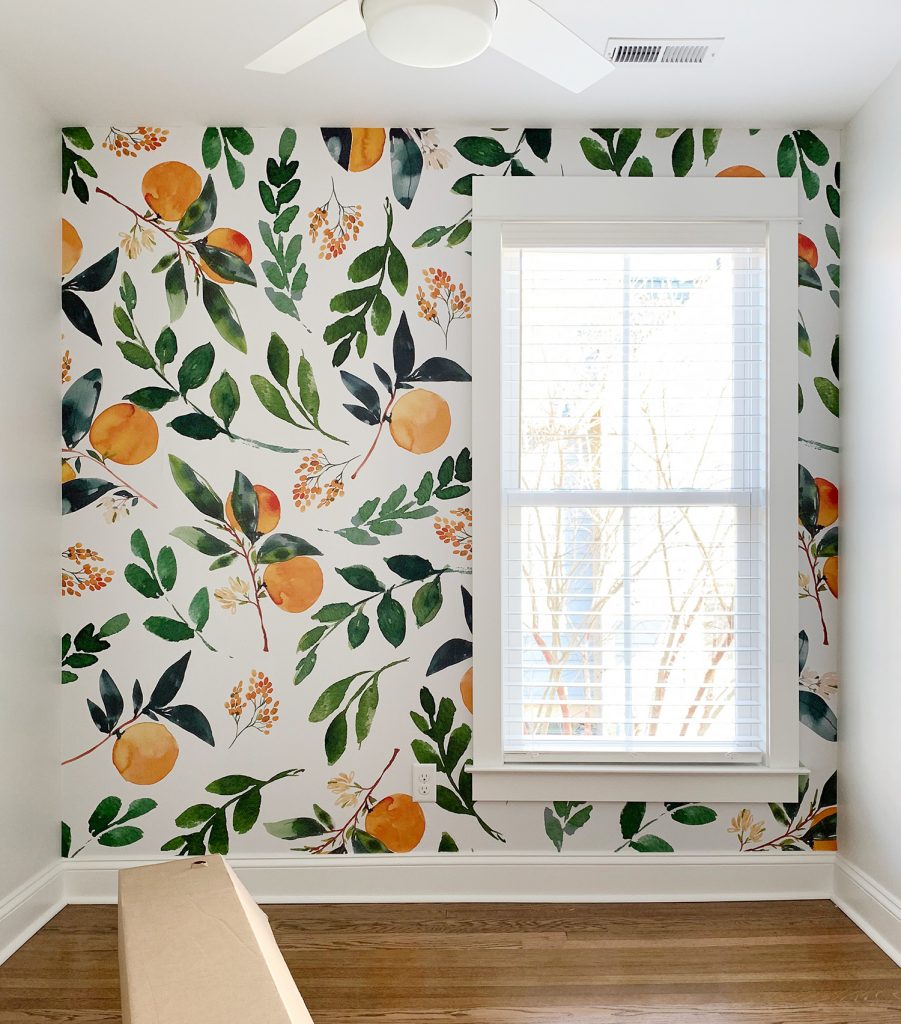
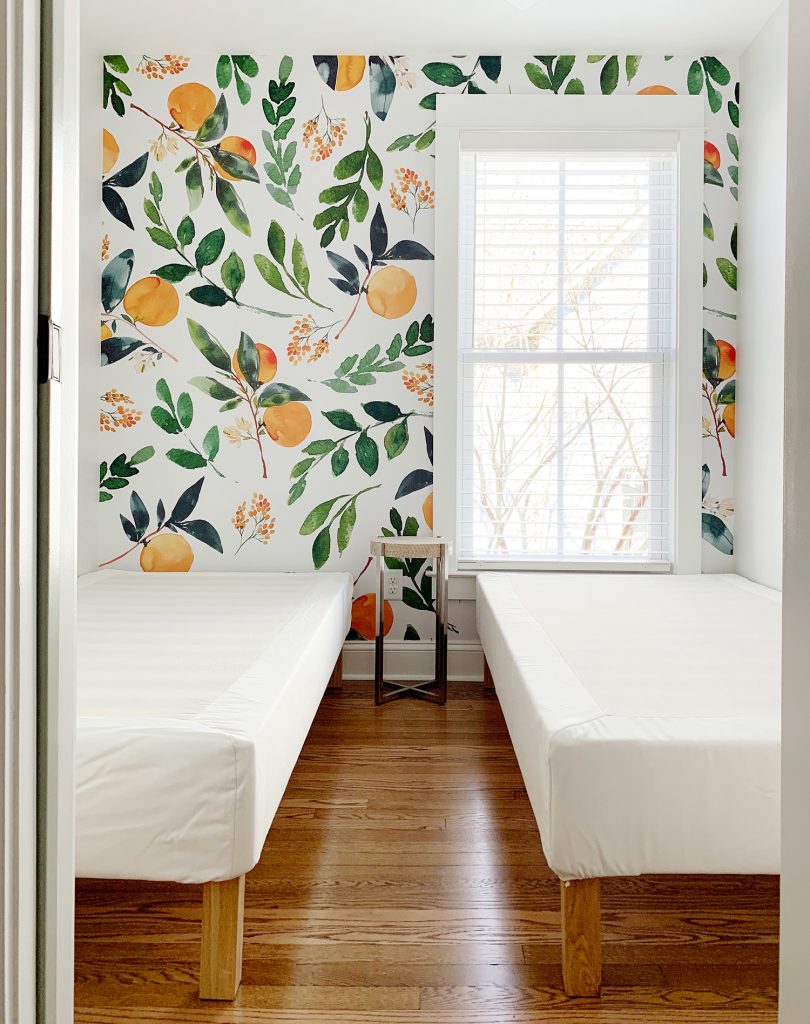
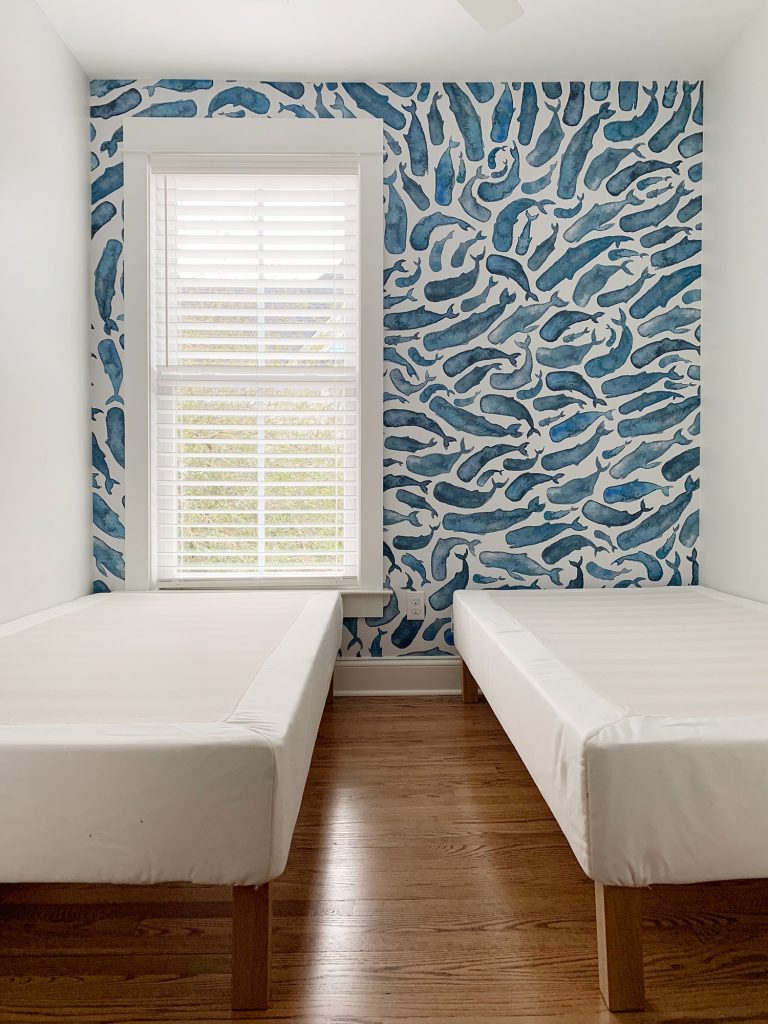
But after a lot of debating, we ultimately decided on two painterly patterns: these whales (seen below) and these oranges (seen in the first photo of this post).
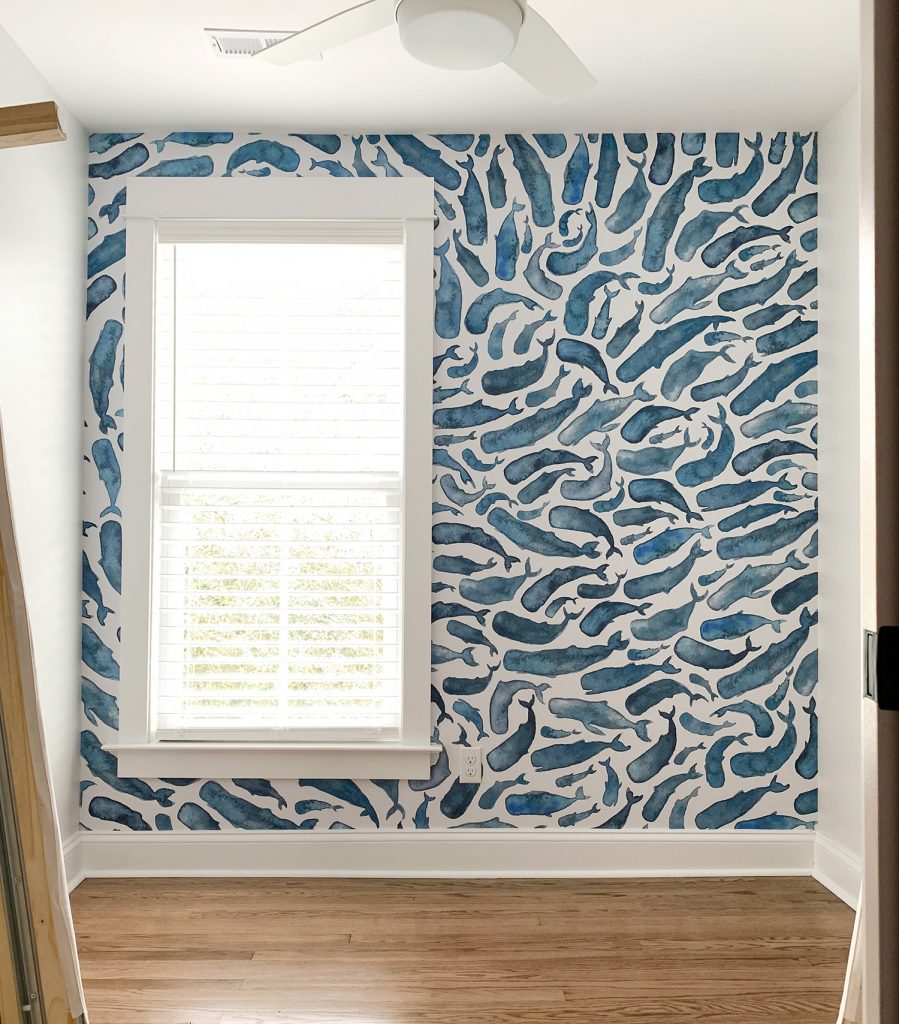
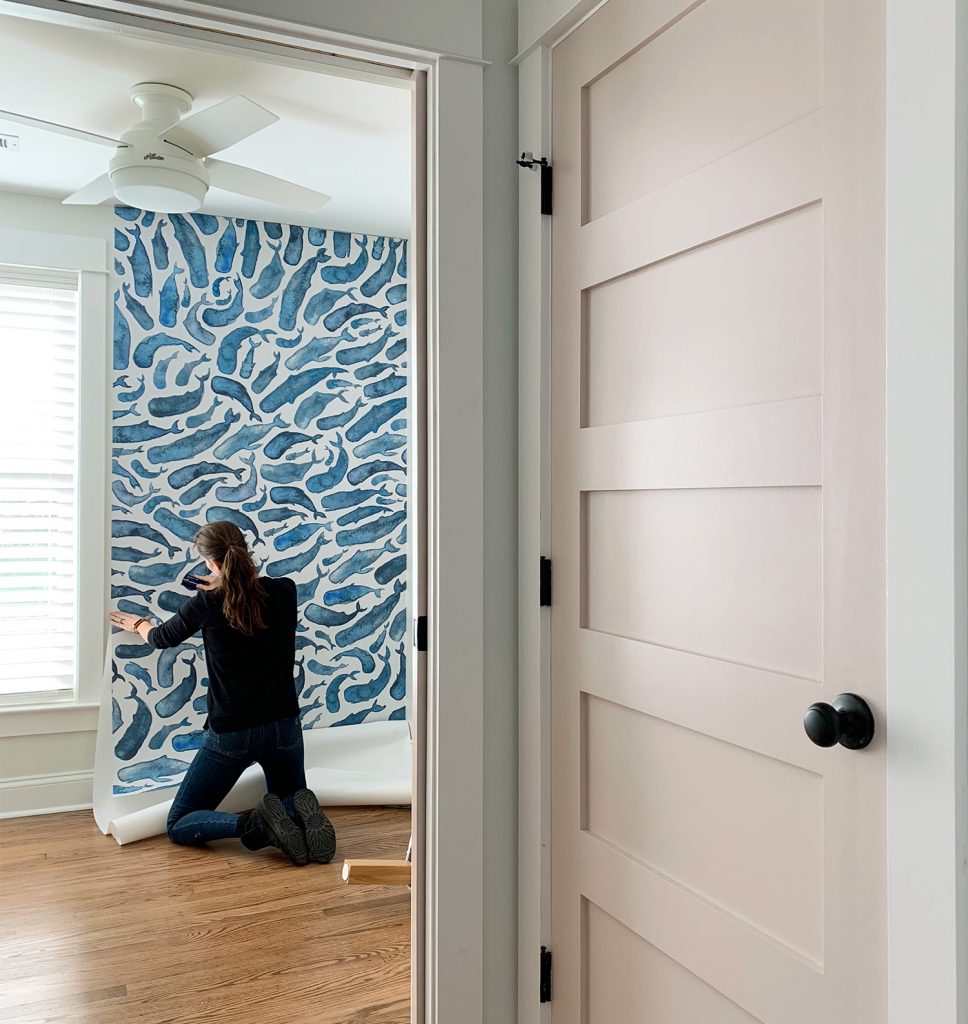
The colors fit well on each side where we used them. We paired the blue watercolor-looking whales with the side of the duplex with the pink doors (they’re White Truffle by Sherwin Williams by the way)…
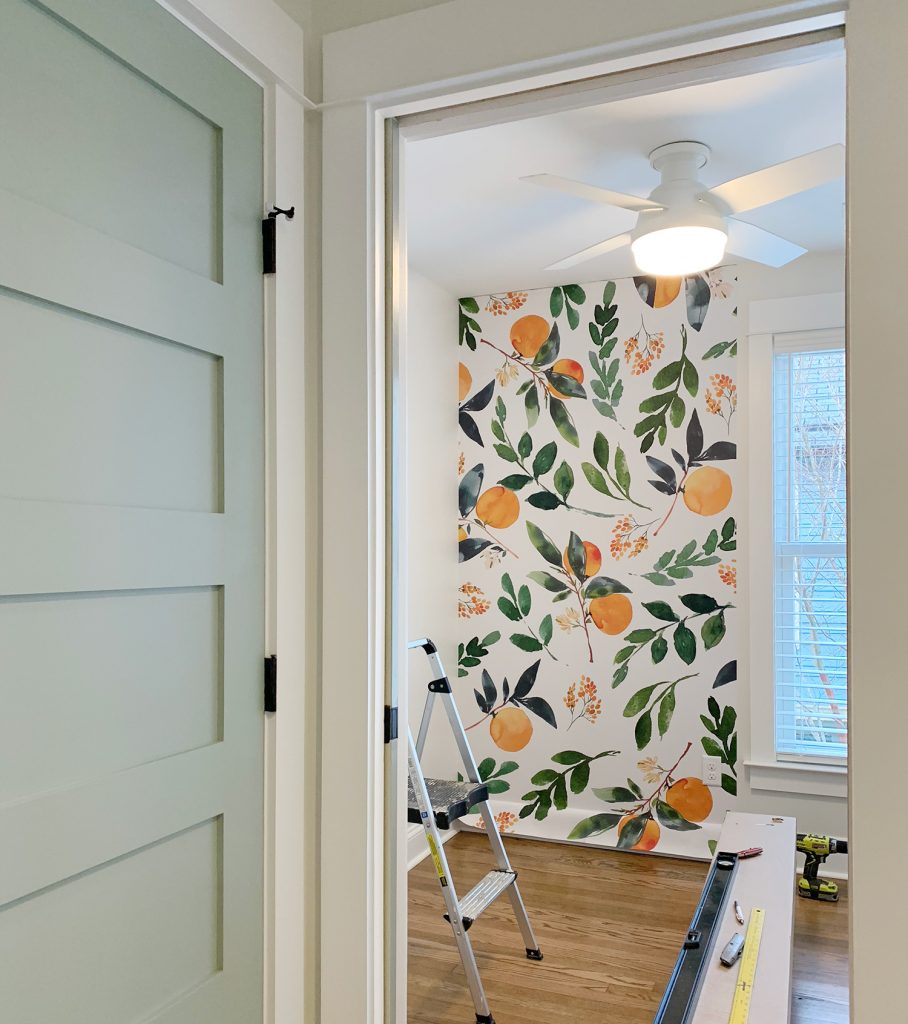
…and the leafy oranges with the side of the duplex with the greeny-blue doors (which are Oyster Bay by Sherwin Williams).
Plus, we snagged them during a 30% off sale at Society6, so we saved nearly $100 off their usual $299 price tag.
As for installing them, here’s how it all went down (er, up?). Again, it was surprisingly straightforward to do – but it does require a bit of patience and care. The first one took us around three hours to complete, and the second one only took about two hours, so once you get the hang of it, it’s much less intimidating and goes a lot faster.
Tools & Supplies Needed
You can install wallpaper or a wall mural like this with very few tools, but having the following will make it easier:
- Step ladder
- Level
- Pen or pencil
- Ruler or tape measure
- Flathead screwdriver
- Scissors
- Utility knife or other sharp craft knife
- Smoothing tool
- An extra set of hands (this is much easier as a two person job)
Step 1: Organize Your Panels
The 8′ wide murals come with four 2′ wide removable panels all rolled together. Since the pattern isn’t repeating, be sure to identify the order in which your panels need to be hung! It would be a nightmare to hang one on the right side of the room only to realize it should have been hung on the left side for the other three panels to line up. We loosely unrolled ours in a nearby room and laid them across the bed to double-check that we were working in the correct order.
Step 2: Carefully Position The First Panel
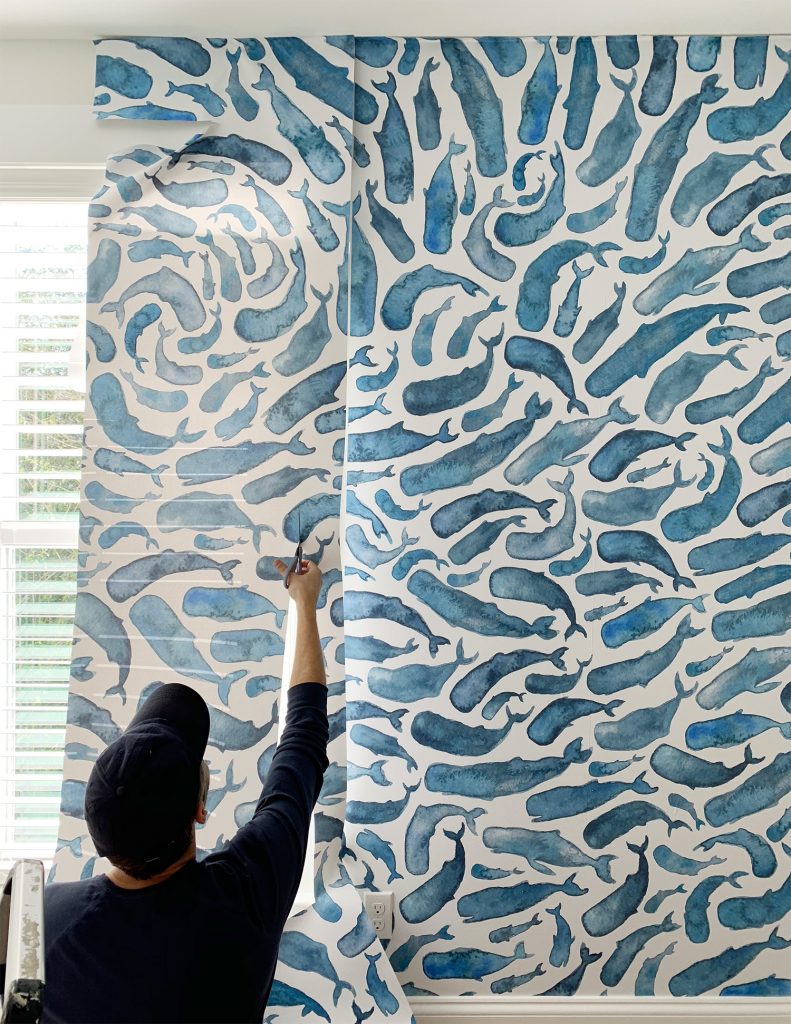
Each wallpaper panel has a removable backing that easily peels off. Again, you don’t need any glue or paste to install these. So throughout the installation, you’ll want to peel back small sections at a time. We started by peeling back the first foot-ish of the first full panel (you can see it folded down behind the top part of the mural that we had stuck to the top corner of the wall in the photo below:
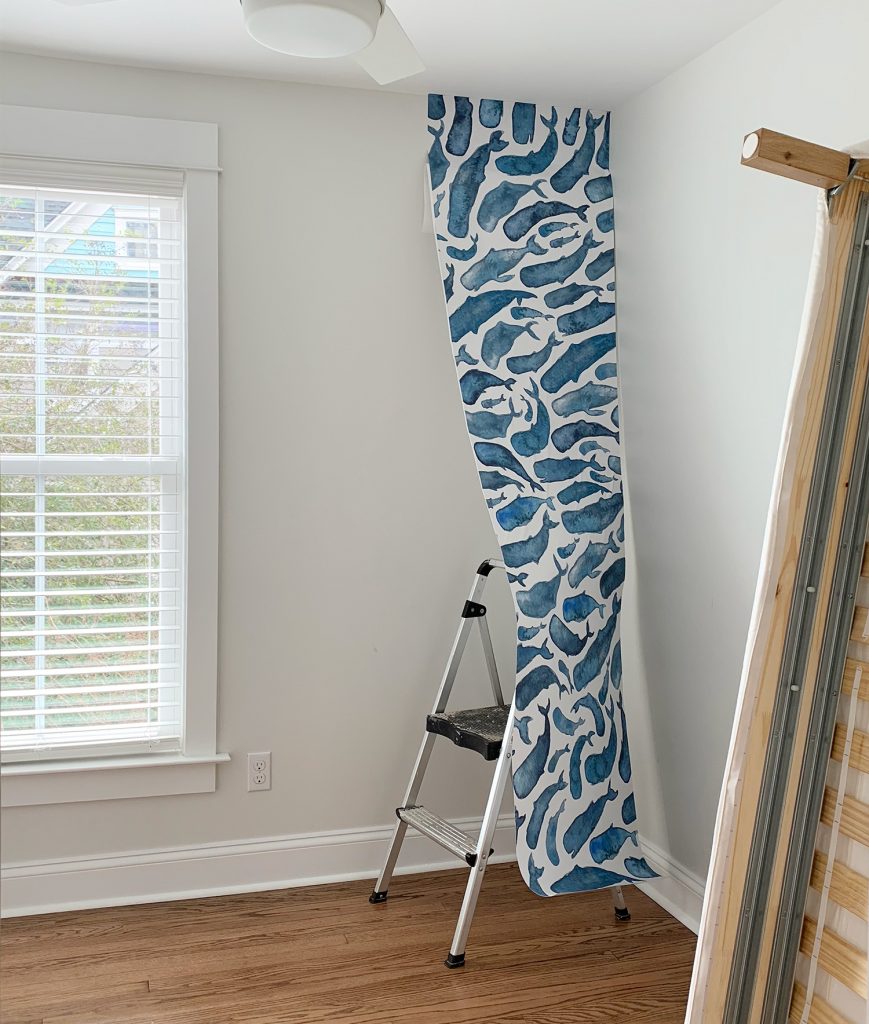
Not to psych you out, but getting this first panel hung correctly is a big part of the success of this project. The good news is that these panels are VERY FORGIVING. Seriously, we probably hung and rehung this first section 4 or 5 times while we figured out the best system. It didn’t lose any of its adhesion strength each time that we stuck, unstuck, and restuck it – and it didn’t wrinkle (even if we accidentally stuck it to itself a few times, we could carefully peel it off and it was fine).
You’ll be tempted to use your ceiling or wall as your level reference point for this first panel. DON’T. Most rooms – including ours – aren’t perfectly straight, so relying on your first corner to be completely square could lead to crooked panels which, even worse, could lead to gaps at the top or sides of your mural as your ceiling or wall bows in or out slightly.
Instead, you’ll want to mark a vertical line using a level to give you a reference point for the outer edge of your first panel. You could do this all the way down the wall, but we found that doing just a couple of feet at the top was enough to get us started.
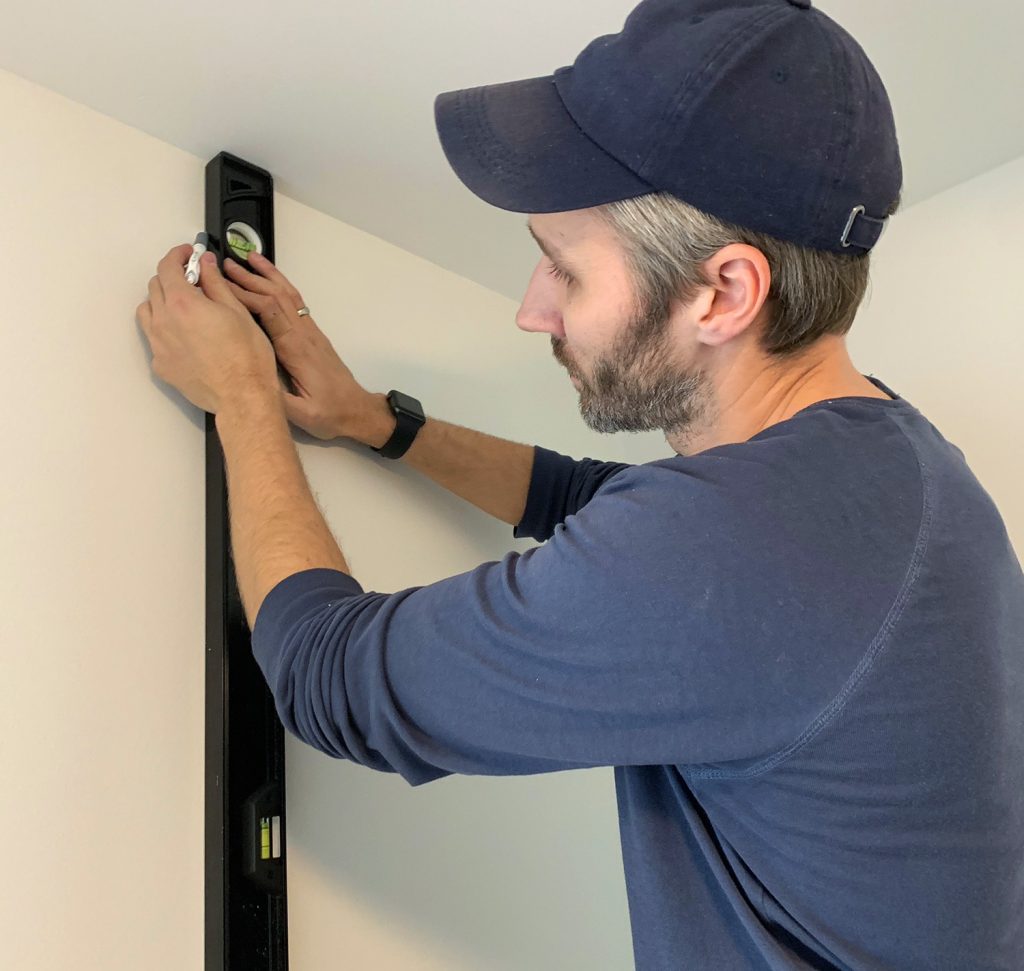
We marked ours about 23.5″ inches from the corner, so that our 24″ panel would overlap the side wall a smidge (again, to make sure we didn’t see gaps anywhere that the wall bowed out). We’ll show you how we cut off all of the overlap a little later.
Then we hung the panel along that vertical line but made sure that it overlapped the ceiling by about an inch as well. Even though our ceilings and the panels are both 8ft tall, we could spare this inch since the baseboards make the actual wall space around 7’6″ – and again, most ceilings aren’t perfectly level all the way across, so we wanted to make sure we had excess to bridge any gaps if the ceiling is slightly higher a little further down the wall.
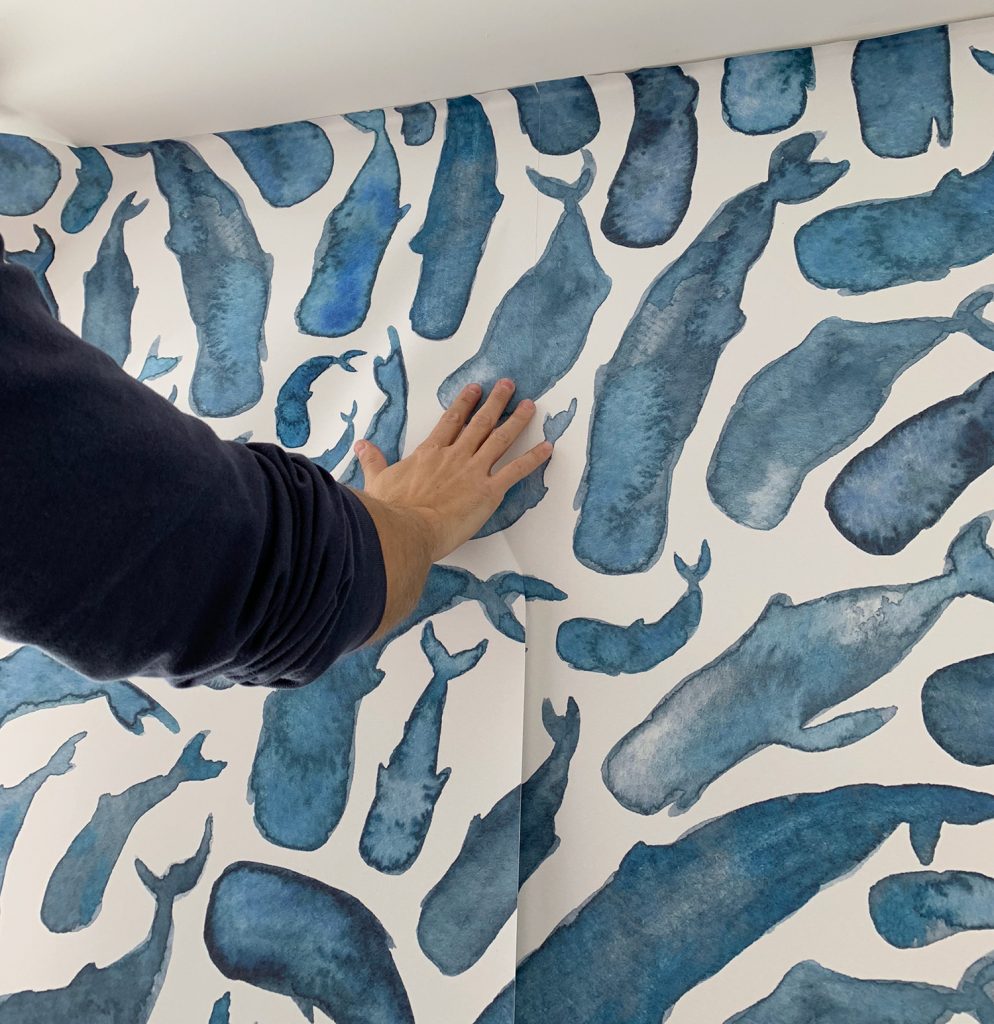
Step 3: Peel, Stick, and Smooth
Once you feel good about the position of your first panel, you can begin the process that you’ll rely on most for this wallpaper installation: peeling off a bit more backing, sticking it to the wall with your hand, and then smoothing out the bubbles. You can see the slight ceiling overlap we mentioned in the photo below, which we will take care of later on.
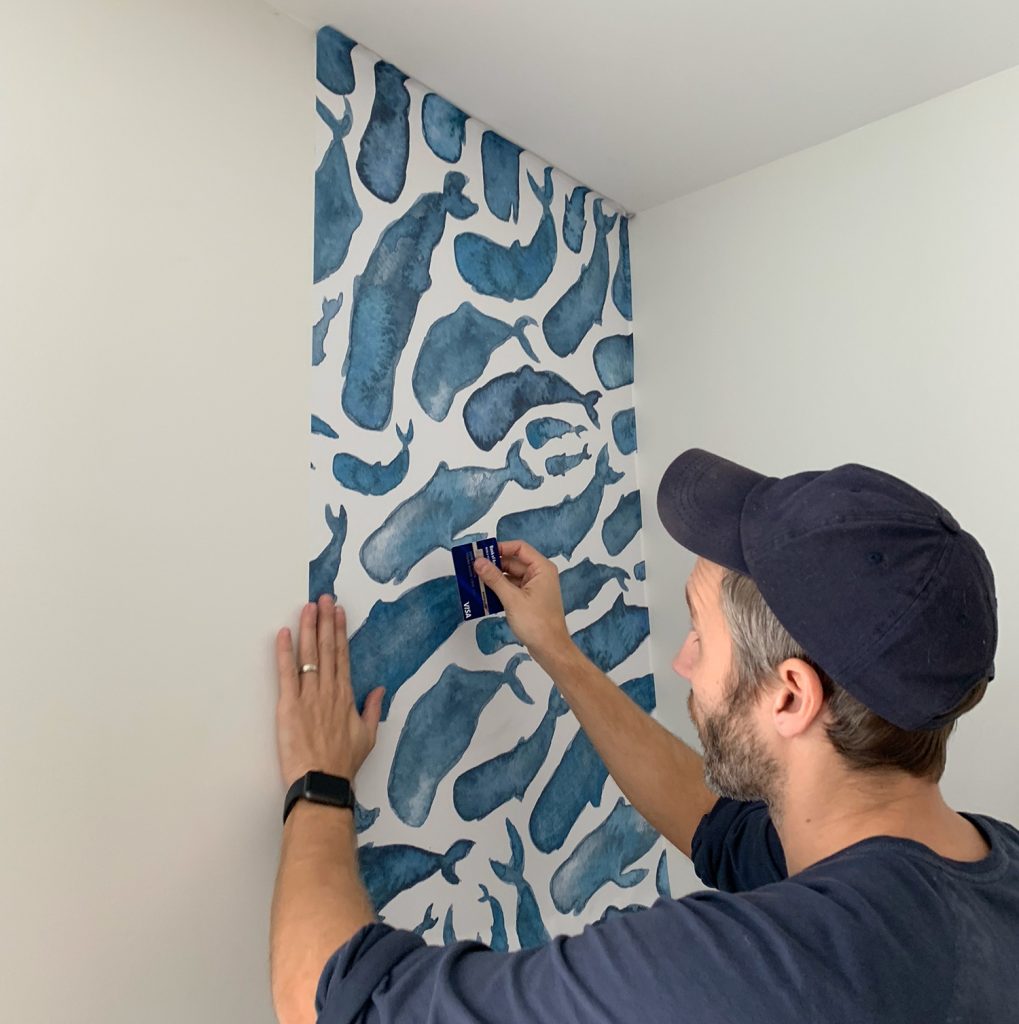
You can buy a smoothing tool meant for this task, but we forgot to bring one with us to the beach, so we pulled a credit card out of my wallet and it did the job just fine.
Our main tip here is to work from the middle out toward the edges, both when you’re sticking things with your hand and when you’re smoothing things afterwards. Also, don’t be afraid to peel it off and restick it if you’re not happy with your placement or if it’s starting to wrinkle. Remember, this particular material is VERY FORGIVING.
Continue to apply the first wallpaper panel in this manner until you get to the baseboard at the bottom. We’ll trim that later as well.
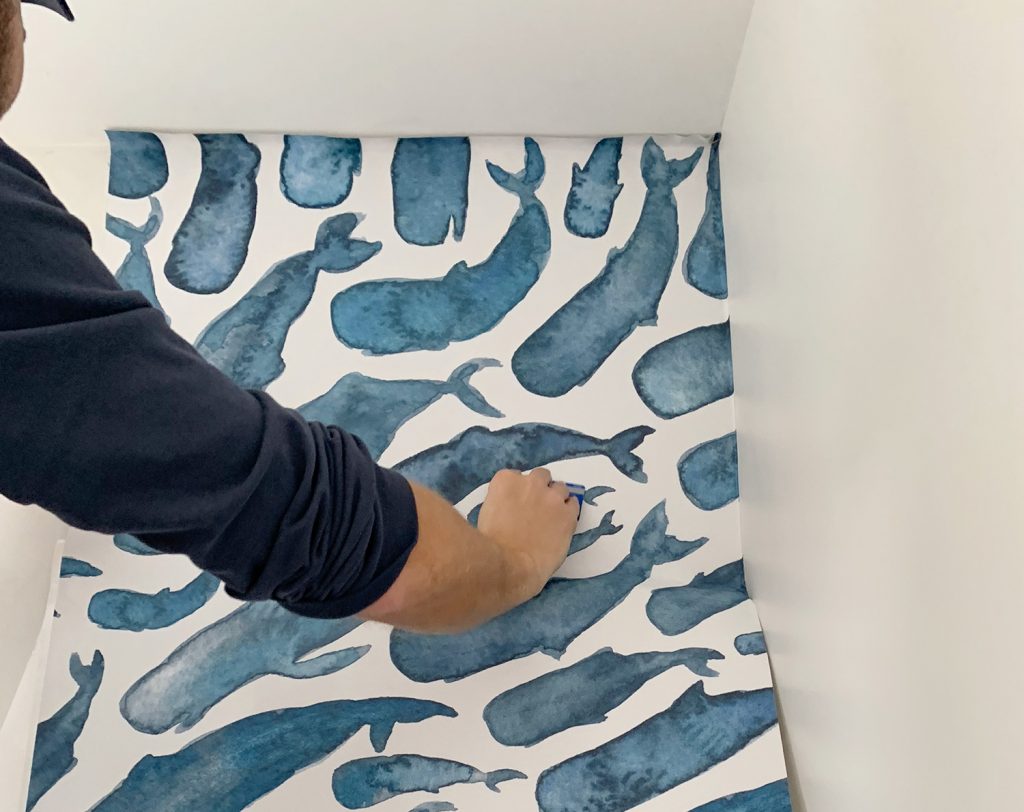
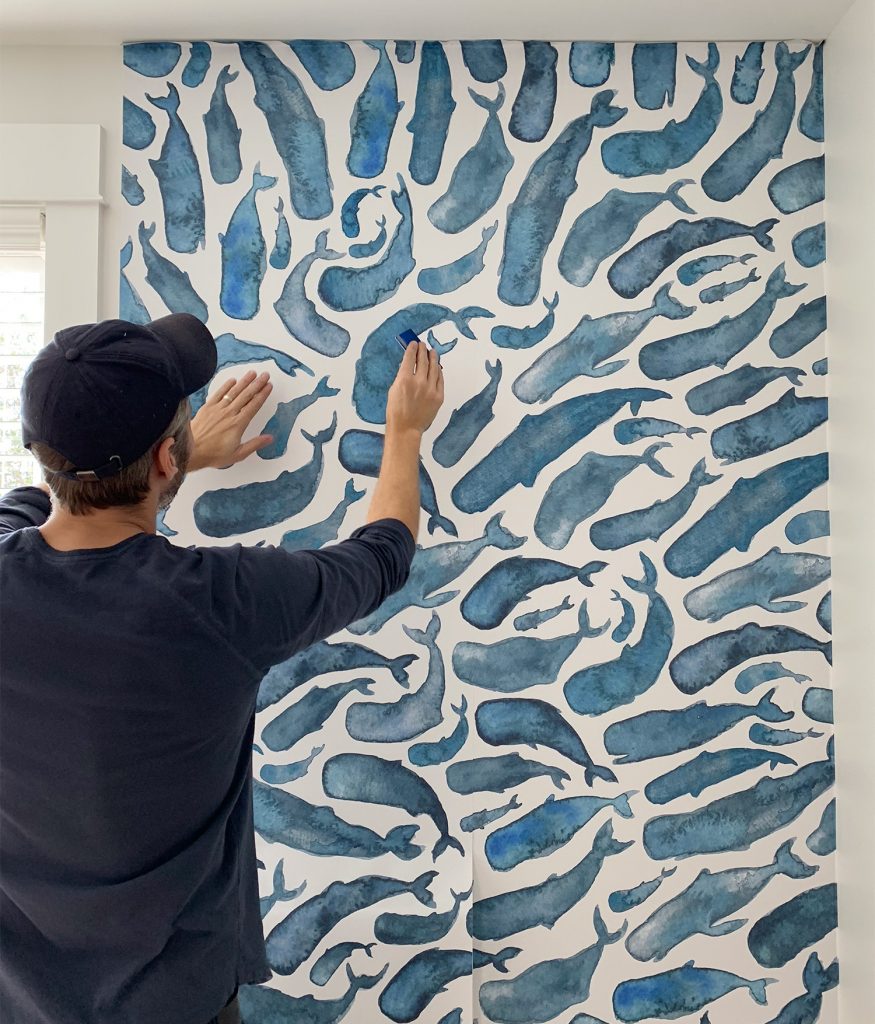
Step 4: Line Up The Pattern On Your Second Panel
If you’ve carefully placed your first panel, this part shouldn’t give you any trouble. These designs aren’t printed with an overlap, so you’ll be butting the second panel up along the edge of the first panel. Just peel a small section of backing off and take your time aligning the pattern. You can peel it off and restick it as many times as you need to get it just right so they line up pretty seamlessly, like you see below:
We did notice that the material has a little stretch to it, so as you smooth it down the wall, it can cause your pattern to travel a bit – meaning your pattern alignment may seem “off” as you go down the wall if you’re pulling and stretching one panel more than the other one.
We combatted this by trying NOT to pull or stretch the material with too much force. And just by generally being vigilant the whole way down. If we didn’t like how anything lined up, we just peeled it back up and tried again.
Step 5: Cut Around Small Obstacles Like Outlets & Switches
If you run into an obstacle like a light switch or wall outlet, don’t worry – it’s super easy. Just turn off the power to that switch or outlet, and once you’re ready to stick the wallpaper around it, use a flathead screwdriver to remove the cover plate. Then loosely stick the wallpaper panel OVER the outlet (if it’s a traditional switch that protrudes a lot, you may need to cut a small slit to allow the switch to peek out so the wallpaper can sit flatter against the area).
You should be able to feel the outline of the obstacle through the paper, so use your utility knife to carefully cut along the edges – being careful not to cut any areas that won’t be covered by the switch plate or outlet cover.
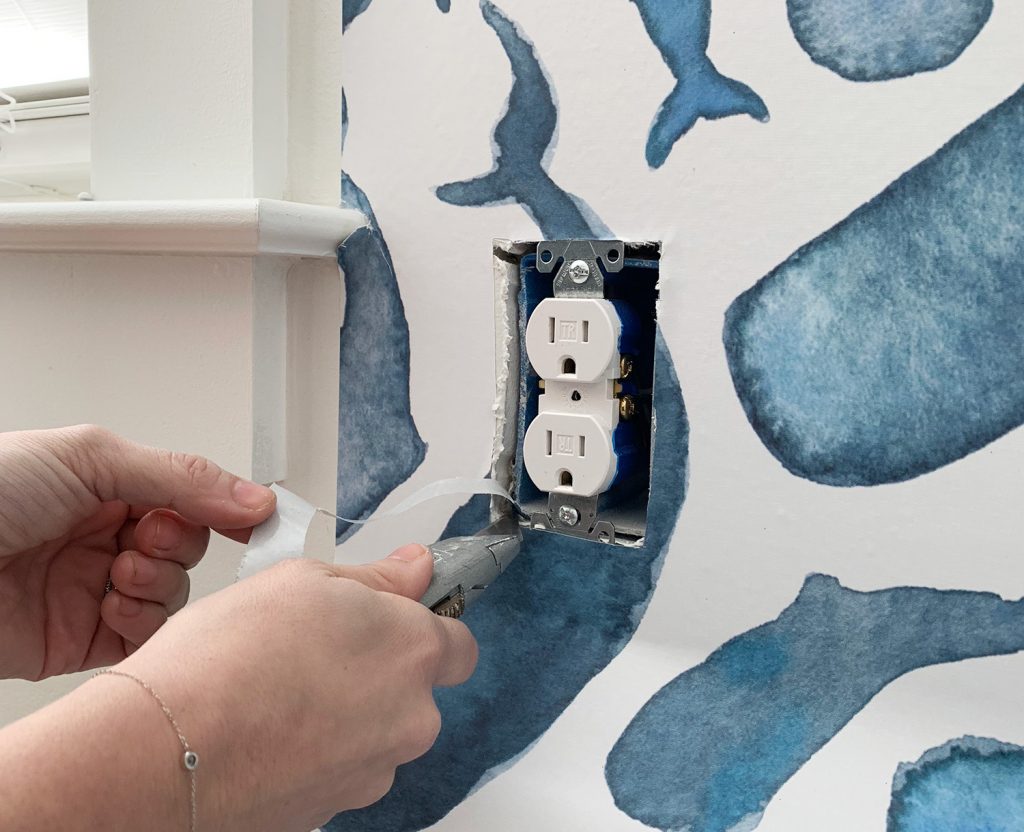
It doesn’t have to be a flawless cut, just be sure to remove enough that the outlet or switch could be easily removed if/when needed. Then just smooth the area down and screw the cover back on so it looks polished and finished (you can see the finished outlet in the picture below).
Step 6: Cutting Around Large Obstacles Like Windows & Doors
Hanging our last two wall mural panels presented the added challenge of cutting around a large window that would interfere with significant sections of the pattern.
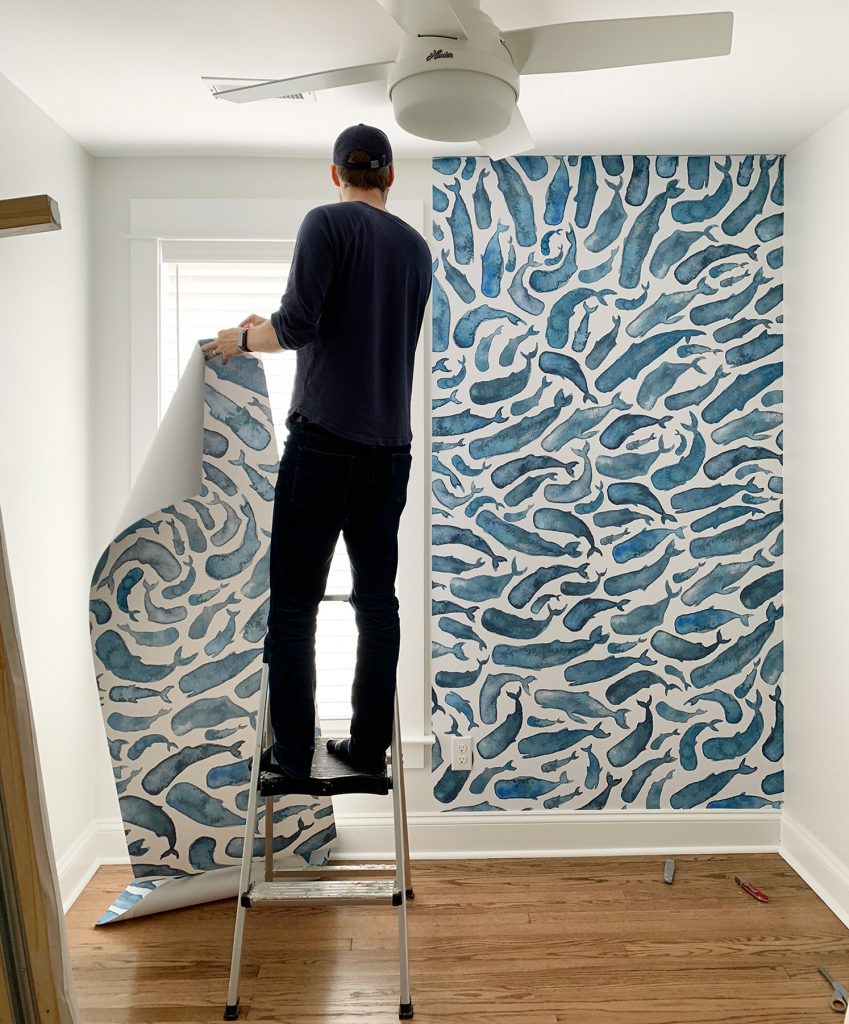
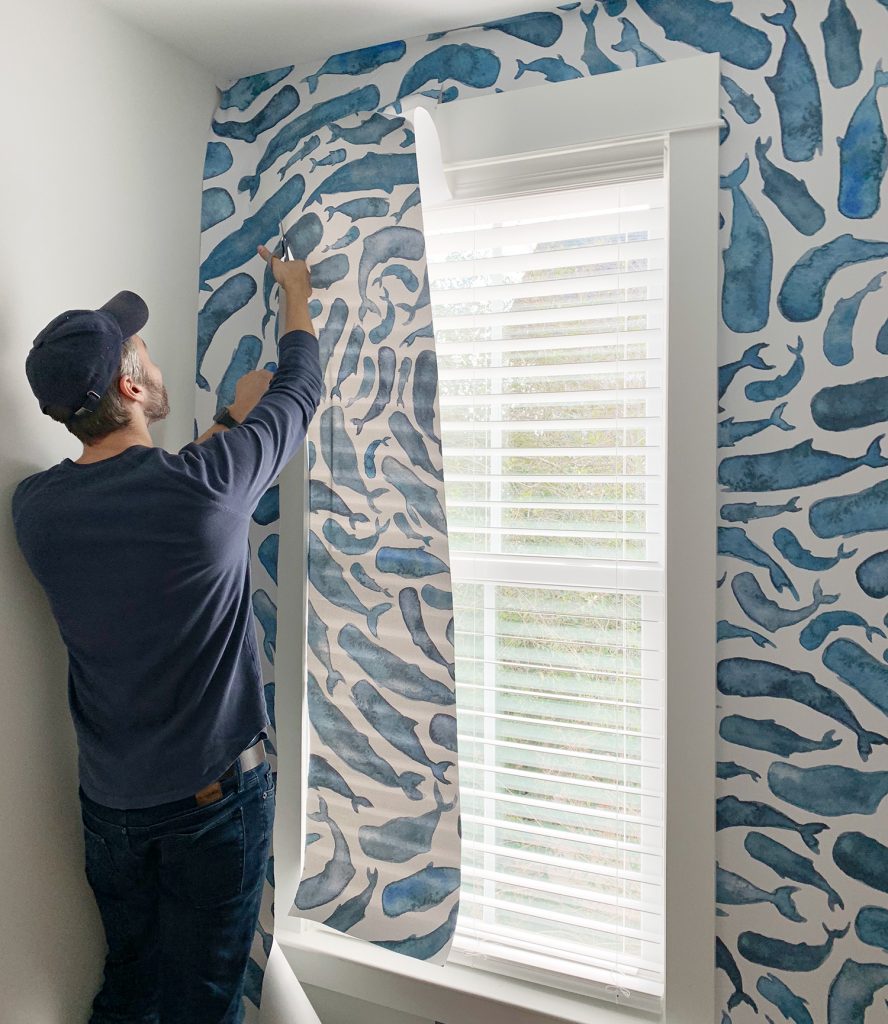
We started each one of them the same way we did the full panels – peeling back a small section at the top and aligning the pattern. But once the window trim preventing the panel from hanging flat, we broke out the scissors and roughly cut out the area that would have covered the window.
We were VERY CONSERVATIVE in doing this, leaving 3-4 inches of excess, and trimming more as we felt more confident we weren’t cutting off too much. It’s a little tricky getting around corners (you kinda have to cut a diagonal slit in it).
Once enough is trimmed off so that you can press it flat onto the wall, then it’s just a matter of (say it with me!) peeling, sticking, and smoothing. You’ll still have some excess overlapping the trim, but just like the excess along your baseboard, side wall, and ceiling, it’s just fine. You’ll trim it off later.
Step 7: Finishing Your Final Wallpaper Panel
I’m not gonna lie: aligning that final part under the window was a little tricky. But I’ll show you how we cheated to keep ourselves from going crazy.
Because of the window, we hung our fourth panel (which was pretty much just a tiny strip between the window and the wall) without being able to align it with the pattern on the previous panel. So by the time we got to the bottom, it didn’t perfectly match up. And if we did match it up – it always left a big bubble or wrinkle, no matter how many times we stuck or restuck it. We tried unpeeling, shifting and resticking it half a dozen times, but with minimal improvement.
So we decided the main priority was aligning the pattern under the window so the vertical seam disappeared. Then we actually sliced the panel apart (gasp!) at a narrow spot between the window and the wall where there was mostly white space. That way, instead of a big wrinkle, we had a smooth, barely-visible overlap.
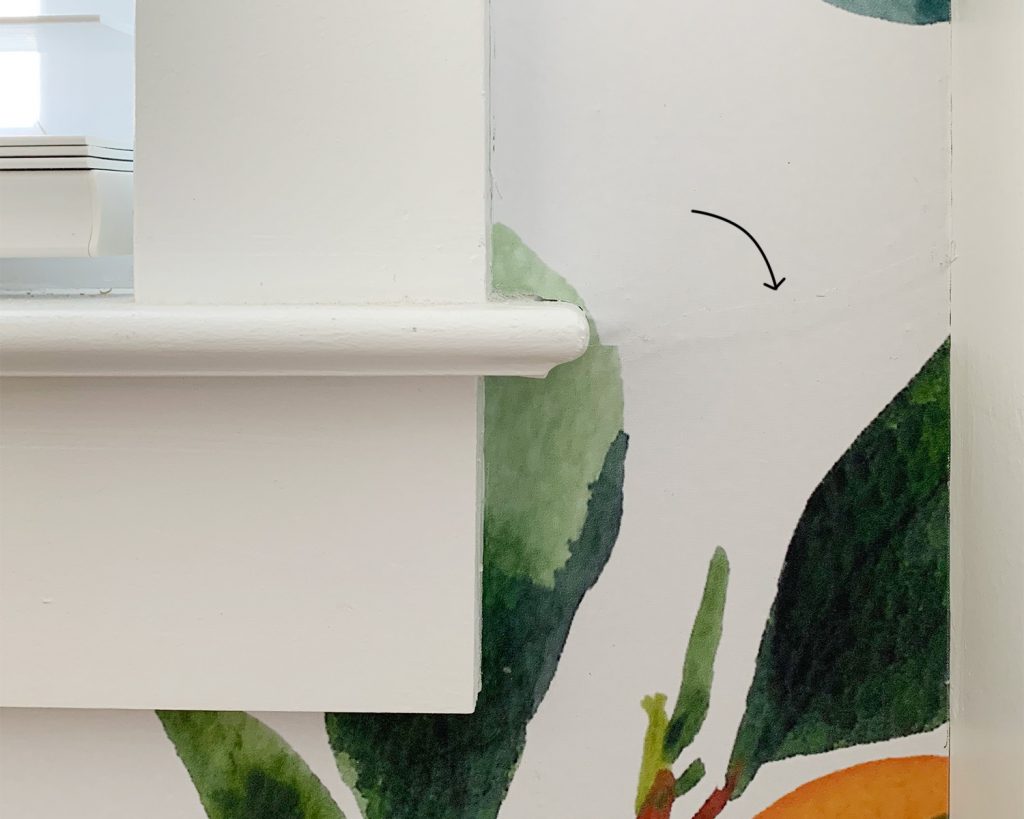
I forgot to take a picture of the overlap on the whale side, but you can see it above on the orange side. It’s suuuuuper subtle (and will be completely blocked by a bed anyways) but we wanted to show you so you didn’t stress yourself out about getting things absolutely flawless.
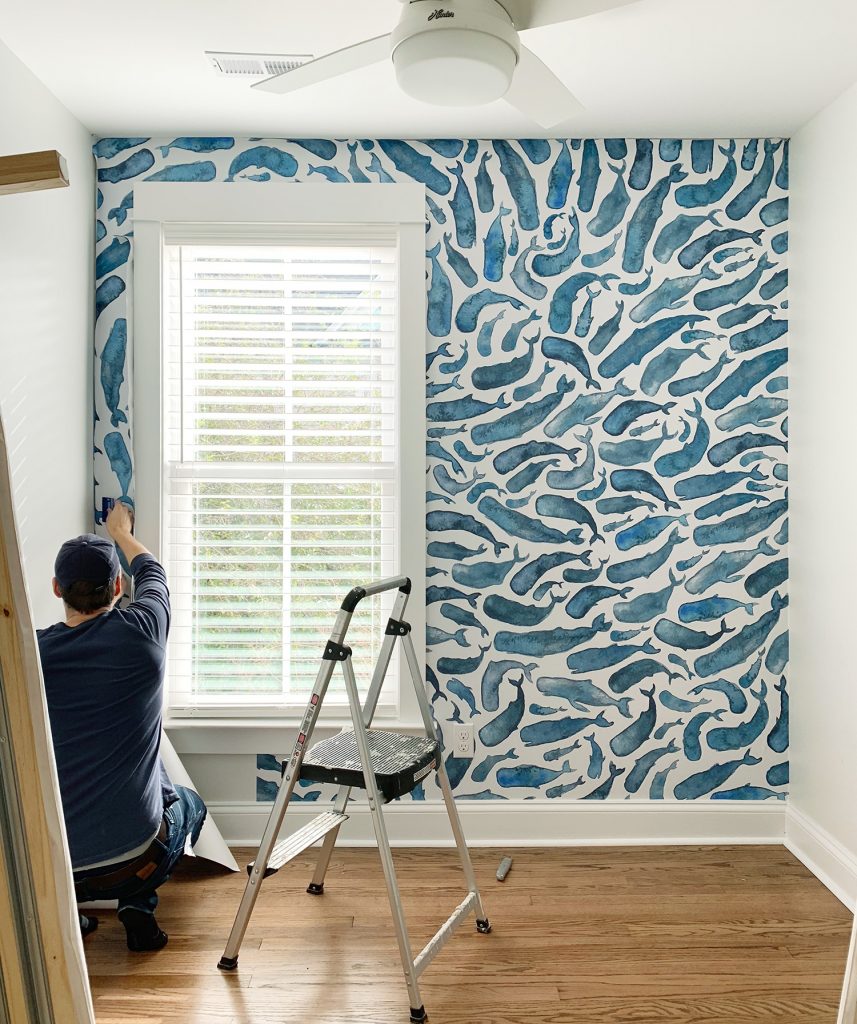
And again, here it is from further away – you’d never notice that small imperfection in the scheme of the entire room, even if it weren’t covered by a bed.
Step 8: Cut Off The Excess With Your Knife
You don’t actually have to wait until the end to trim off all of your excess wallpaper around the ceilings, end walls, and baseboards, but doing it last is a nice insurance policy in case you have to do any major repositioning (we didn’t – but it still felt smart to play it safe). Once you cut it, you can’t un-cut it 😉
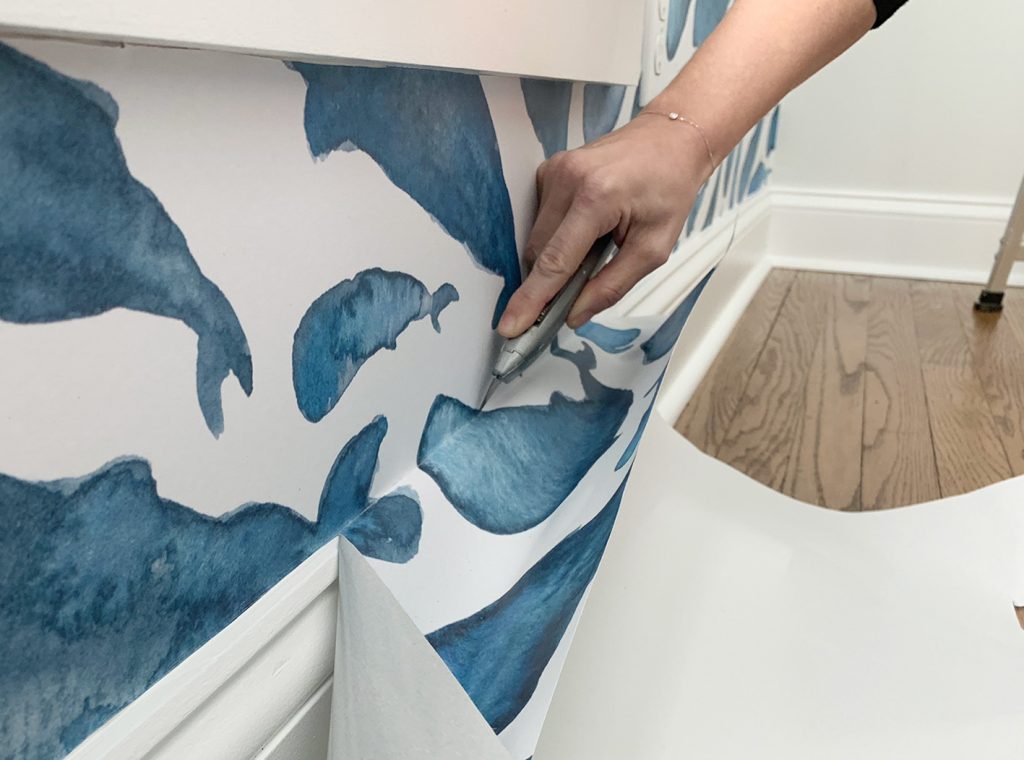
Sherry and I had different techniques for this part. She smoothed everything really well one more time, almost forcing a crease into the edge, and then freehanded the cut along the crease.
I felt a little better smoothing and then actually pressing my smoothing tool (aka credit card) into the crease as I cut, almost using the card as a guide. I think my method worked better in “softer” corners like along the ceiling, but Sherry’s worked speedily along “harder” edges like where the baseboard met the drywall.
Step 9: Repeat!
Okay, not really. Most of you will not have to repeat the process in another room like we did. Unless you were so wowed by the result that you’re already planning another project. It is kind of addicting…
In all seriousness, we’re so happy with how these turned out AND how painless the installation was, we ARE trying to figure out if there’s another spot we could install one in the beach house or our own house.
And as for these rooms, they still need to be fully furnished. We’ve built the two twin bed platforms in each space (they’re these from Ikea), the mattresses are coming, and we’re currently looking for some bedding to finish them off.
You can see in the above photo that we’ve placed a temporary side table in there, just to get a sense of the layout (the aisle isn’t as small as we feared after all, which is great news).
More on these rooms to come! But for now we’re just enjoying how a few hours spent sticking these murals up on each side completely changed how they look. They’re a lot closer to charming little bonus sleeping nooks than they were last week!
P.S. To see other projects that we’ve done at the duplex, here’s how we started laying down rugs & building the kitchens, how we tiled 6 rooms, how we hung operable shutters, and here’s the entire duplex category on our blog if you want to look back on all of our progress.
*This post contains affiliate links*
The post How To Install A Removable Wallpaper Mural appeared first on Young House Love.
from RSSMix.com Mix ID 8294556 https://www.younghouselove.com/how-to-install-removable-wallpaper/
